
Linux & HDR
Current state of HDR
Section titled “Current state of HDR”HDR on Linux has come a long way, from basically an impossible task to now a workable HDR experience. Saying this, HDR on Linux still has a long way to go, as it does not have a plug-and-play experience yet. For most gaming experiences, it works flawlessly, however.
What is working in regard to HDR:
- You can turn on HDR in your DE (Currently KDE & Gnome)
- You can play local HDR videos using a video player (Currently only on MPV)
- You can play HDR videos in Firedragon 12+ (with the caveat that if the browser HDR setting is enabled, SDR videos do not work)
- You can play games in HDR (Works across any recent mainline or fork of Proton)
What is NOT working in regard to HDR:
- You can’t take HDR screenshots
- You can’t record HDR videos
- You can’t play SDR videos in Firedragon 12+ when the browser HDR setting is enabled
- You can’t play HDR videos in most of the browsers (except the latest Firefox and its forks with the caveat above)
Three main conditions are needed in order to use HDR:
- You need to have an HDR capable monitor
- You need to have a DE with HDR support
- You need to use Wayland
The point of this article is to share information on the HDR options and, if possible, the best settings (or guide to configuring the settings) for non-HDR + HDR settings in supported DEs.
Monitor Settings
Section titled “Monitor Settings”For the purposes of this wiki article, the following hardware was used to demonstrate:
- Monitor AW3423DWF
- GPU 9070XT
For when HDR is disabled, there are 2 profiles to consider.
The first one will cap the color space to sRGB, but it will be the most accurate representation of white balance, colors, and color temperature.
- Color accuracy - Pure sRGB - Creator > sRGB + Gamma 2.2 You can also set P3, but it does not matter, because we will always keep HDR in KDE ON. If you disable HDR and want more colors, P3 in pure SDR is good. Also, it is very important to point out that the monitor used to create this article, “AW3423DWF”, is factory calibrated for sRGB and P3 out of the box. This may not be true for every monitor.
The second one will be less accurate in regard to colors and white balance but will give you more vivid colors. Yet still will keep more true to real colors than the Standard preset.
- Vivid colors - Less accurate - Custom > Gain > 97-98-100 The gain is different for each monitor. There are no universally applicable settings.
Rest of the settings:
- Everything else is off/default
- Brightness/Contrast both at 75%
- HDR modes:
- Peak 1000 - HDR1000
- True Black - HDR400
KDE Plasma
Section titled “KDE Plasma”KDE Plasma probably has the easiest HDR experience, as the devs integrated HDR into the DE directly. To turn on HDR is as easy as clicking one option in the settings.
- System settings → Display & Monitor → High Dynamic Range → Enable HDR → Apply
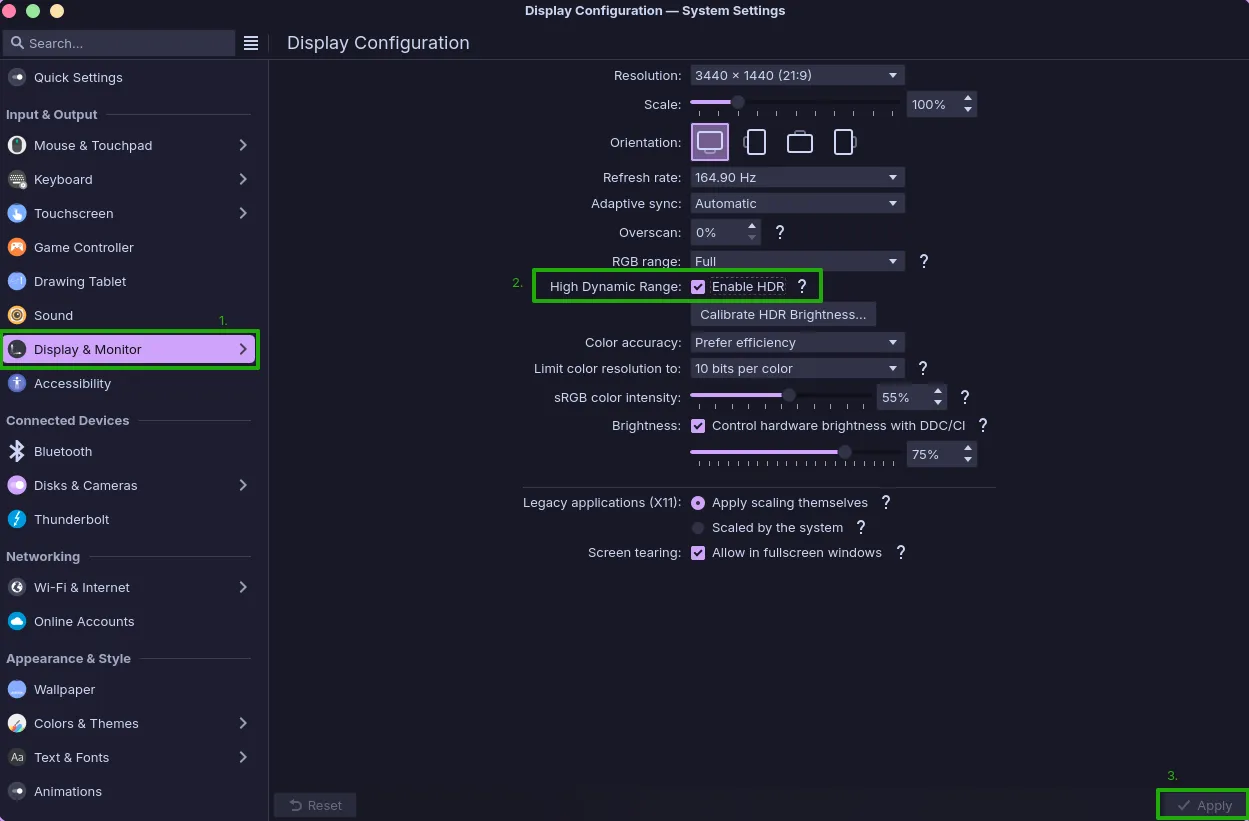
HDR settings & options
Section titled “HDR settings & options”When HDR is enabled, 2 new settings/options appear in the Display & Monitor menu:
- Calibrate HDR Brightness
- sRGB Color intensity
With enabling HDR you most likely will ask yourself 3 questions:
- What are those extra options for?
- Why are the colors so flat, ugly, washed out and dim?
- How should I use them?
What are those extra options for?
Section titled “What are those extra options for?”Calibrate HDR Brightness
Section titled “Calibrate HDR Brightness”-
Peak HDR luminescence (which displays often report wrong)
This shows a white square covering 10% of the display area at 10000 cd/m² (which the monitor limits to the maximum it can actually show), and the Plasma logo at a luminescence level configured by the user.
- Adjust the brightness level so the Plasma logo is barely visible.

-
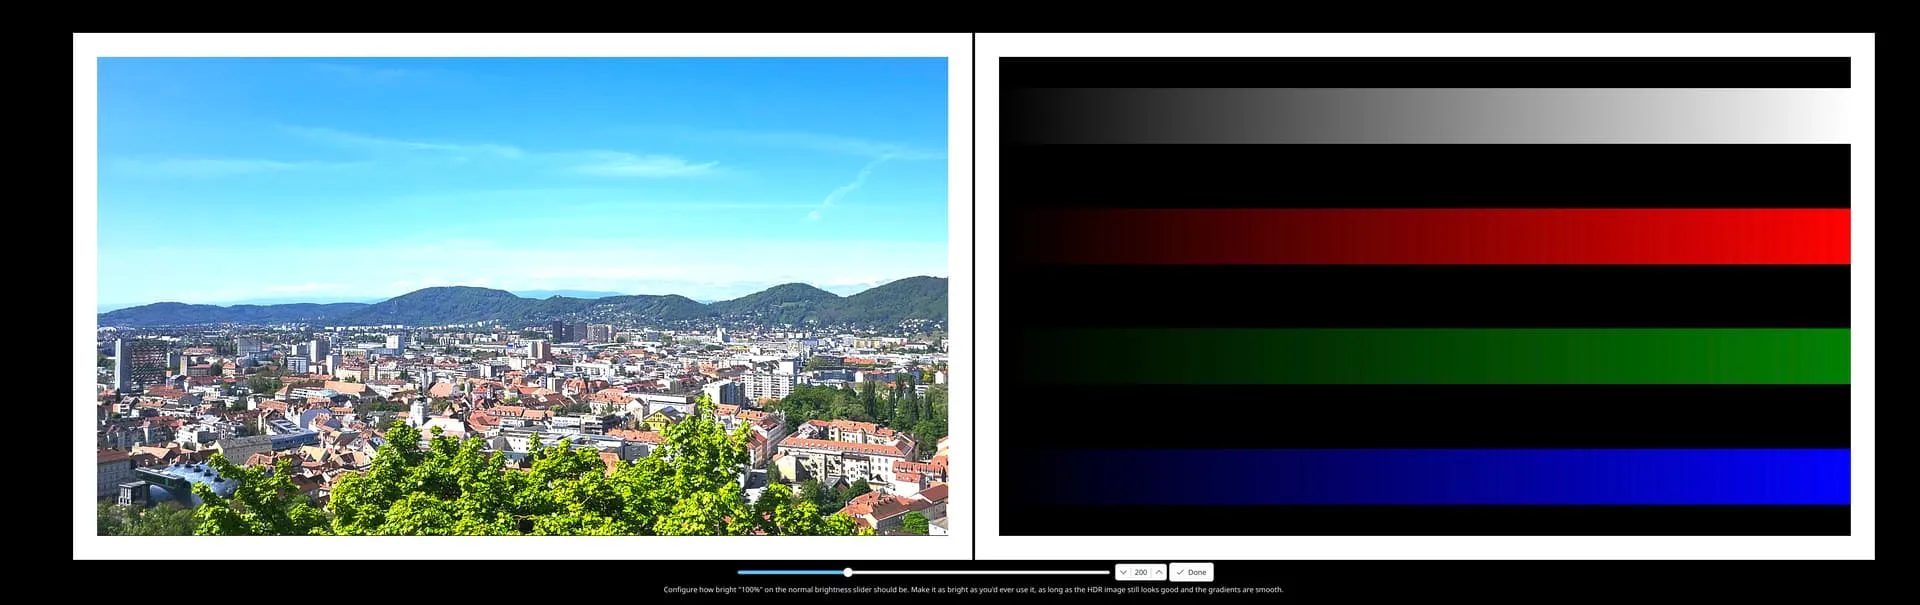
Max SDR luminescence (previously known as maximum SDR brightness)
This option changes what “100%” of the normal brightness slider means and needs to be configured
- low enough so that the monitor’s tone mapping doesn’t interfere with image quality
- low or high enough to match user preference
-
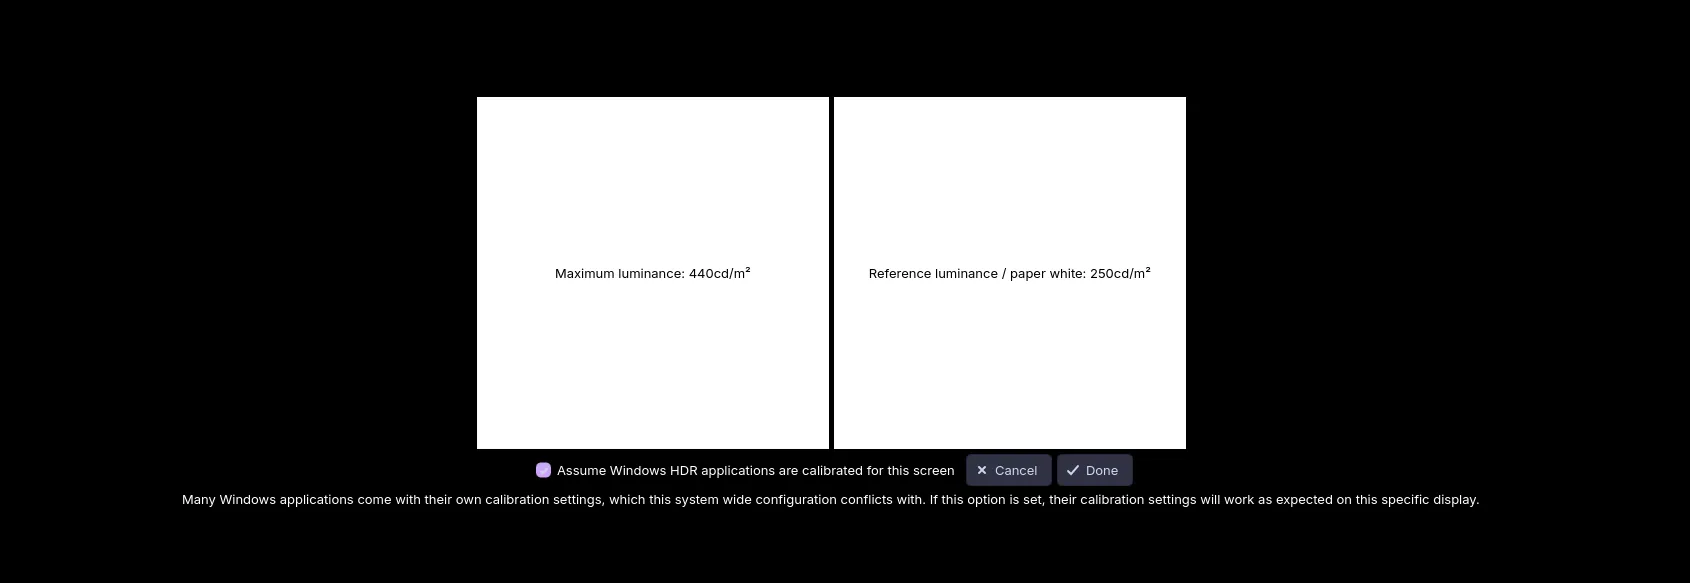
Summary & Windows app option
This option shows the to be applied HDR calibration settings. Additionally it allows the user to choose which screen or rather which calibration Windows applications on the system can be assumed to be calibrated towards.
- Review summary
- Allow Windows application to have their own calibration settings work in Plasma
sRGB Color intensity
Section titled “sRGB Color intensity”This option is inspired by the color slider on the Steam Deck. For sRGB applications, it scales the color gamut up to (at 100%) rec.2020, or, more simply put, it makes the colors of non-HDR apps more intense to counteract the bad gamut mapping many HDR displays do and makes the colors of SDR apps look more like when HDR is disabled.
Why are the colors so flat, ugly, washed out, and dim?
Section titled “Why are the colors so flat, ugly, washed out, and dim?”The answer is rec.2020.
When you enable HDR, it does not use sRGB, P3, or other monitor preconfigured color spaces. It uses the proper HDR rec.2020 color space. In HDR content, this color space will make life shine bright and colorful. However, the problem is the DE and the non-HDR content will have “washed out colors” and your screen may look “dim”.
In order to combat that, we can use the sRGB Color Intensity & Calibrate HDR Brightness options.
How should I use them?
Section titled “How should I use them?”It depends on personal preferences and the capabilities of your monitor. The below settings will try to provide a sweet spot for HDR enabled + HDR content + SDR content. Basically the intent is to tune the visual to the same level as the SteamDeck OLED. This is because the Steam Deck OLED has very vivid yet not so much over-saturated colors out of the box.
KDE Plasma - Display Configuration
Section titled “KDE Plasma - Display Configuration”This HDR mode and settings should give you the best experience for peak highlight brightness. It really makes the details !POP! like: fire, explosions, etc.
The downside to this is something called ABL. Some people do not see it, some do, and it mainly depends on the content you are using it on. For example, when you have a darker scene, ABL will not kick in. But if you have a brighter scene, ABL will kick in, and the overall picture may look a bit dim compared to when HDR is turned off. This will be more visible in SDR.
If that’s the case, and you still want to use HDR, you can use the True Black - HDR400 mode.
- HDR enabled
- Color accuracy - Prefer efficiency The other mode has a performance impact
- sRGB Color Intensity ~55%
- Calibrate HDR Brightness
- Peak HDR luminescence - 970 nits
- Max SDR luminescence - 250 nits
- Summary & Windows app option - Windows applications option checked
- Brightness 75%
This HDR mode caps the MAX brightness at ~400nits. Meaning, highlights will not !POP! as much as in the first mode, but it is not as vulnerable to prompting ABL.
- HDR enabled
- Color accuracy - Prefer efficiency The other mode has a performance impact
- sRGB Color Intensity ~55%
- Calibrate HDR Brightness
- Peak HDR luminescence - 440 nits
- Max SDR luminescence - 250 nits
- Summary & Windows app option - Windows applications option checked
- Brightness 75%
How to enable HDR in games
Section titled “How to enable HDR in games”-
You need to install gamescope
-
Add the following to the game’s Launch Options in Steam:
-w-hchanges the resolution, and should be set to your monitor’s native resolution-fenables fullscreen-rchanges the refresh rate, and should be set to your monitor’s refresh rate--adaptive-syncenables VRR, should be set if the monitor supports it and it’s enabled in KDE--hdr-enabledenables HDR
Terminal window gamescope -w 3440 -h 1440 -f -r 165 --adaptive-sync --hdr-enabled -- %command%
Troubleshooting
Section titled “Troubleshooting”Performance issues
Section titled “Performance issues”1. Game & Camera stutter
Section titled “1. Game & Camera stutter”kwin-effects-better-blur-dx (legacy)
Section titled “kwin-effects-better-blur-dx (legacy)”In case you see weird camera or game stutter, try to disable kwin-effects-better-blur-dx or put gamescope into the exclusion list. I tested as well games without gamescope and looks like the issue is present as well there.
To fix this you have 3 possibilities:
-
Disable Better Blur DX
Settings > Windows manager > Desktop Effects > Disable Better Blur DX > Apply
-
GAMESCOPE ~ Exclude gamescope from Better Blur DX
Settings > Windows manager > Desktop Effects > Go to settings in Better Blur DX > Go to Force Blur > add into the list
gamescope> enable Blur all except matching > Apply -
NON-GAMESCOPE ~ Exclude Steam games from Better Blur DX
_Settings > Windows manager > Desktop Effects > Go to settings in Better Blur DX > Go to Force Blur > add into the list
/(steam_app_[0-9]\*)/> enable Blur all except matching > Apply_